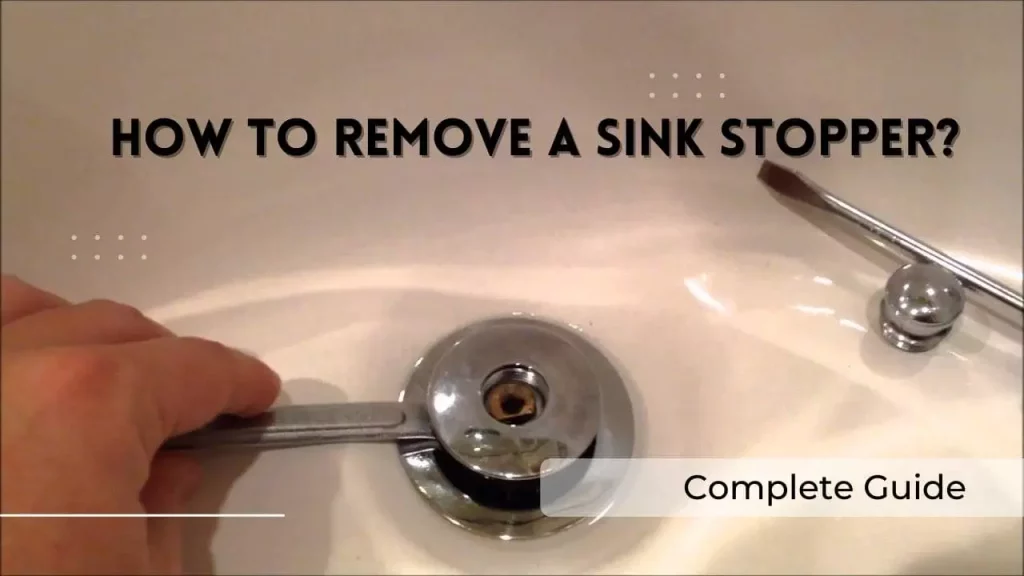
Bathroom sinks are the most commonplace to find pop-up stoppers. Unfortunately, it can be challenging to remove this stopper if the drain gets blocked or the device breaks. We’ll show you how to remove a stopper so it may be updated or the drain cleaned correctly. But when we talk about home Diy, a few items appear to be much better than they are. We give hundreds of examples, but the one thing we are doing today is the plug on your sink.
While some sink stoppers are simple to install and remove, most are not. As a result, we will show you how to remove a sink stopper in the right manner.
The Different Kinds of Sink Stoppers
As previously stated, some sink stoppers can be popped in and out, while others cannot. While there are many different types of sink stoppers available, three are commonly seen in bathrooms around Sacramento and the East Bay.
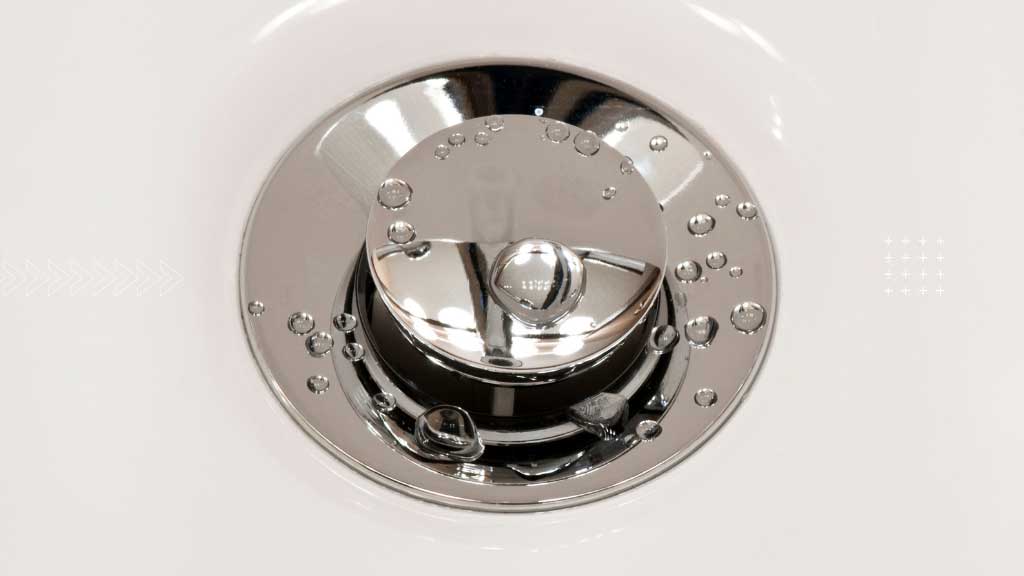
1- Pop-Up Sink Stopper
A lift handle is used to raise and lower pop-up sink stoppers. When they’re knocked down, they cover the sink, preventing anything from going down the drain. The sink is open when it is pulled up. The most frequent sort of sink stopper we see is this one.
2- Turn and Lift
As the name suggests, a lift and turn sealer can be pulled out of the sink with the spin of a handle. The big knob in the center distinguishes these stoppers.
3- Pull and Push
It may appear to be the same, but they are not. To use a push-and-pull stopper, simply push it down and draw it up.
You may also like to read How to Remove a Bathtub without Damaging Tiles
What is the Function of a Sink Drain Stopper?
Pop-up sink stoppers function by connecting the plug to a linkage, a rod that runs beneath the faucet. A ball rod connects the machine to the other ball rod. The ball rod holds the stopper in place when you put it down the drain. The stopper may no longer stay intact if the connection breaks or becomes deformed. In addition, the plug will not produce a watertight seal if it is broken. If either of these problems happens, the best option is almost ready to substitute the sink stopper.
Remove Sink Stopper Bathroom
As much as you have the right tools, removing a sink stopper is a straightforward process. However, this job does not necessitate the use of a great deal of specialized equipment. Standard tools included in most toolkits can be used to remove a sink stopper. You might also use this time to perform other tasks, such as unblocking the drain.
The sink drain flange must be removed for this. So, if you’re curious about how to remove a bathroom sink drain flange, you’ve come to the right place.
How to Remove Bathroom Sink Drain Flange
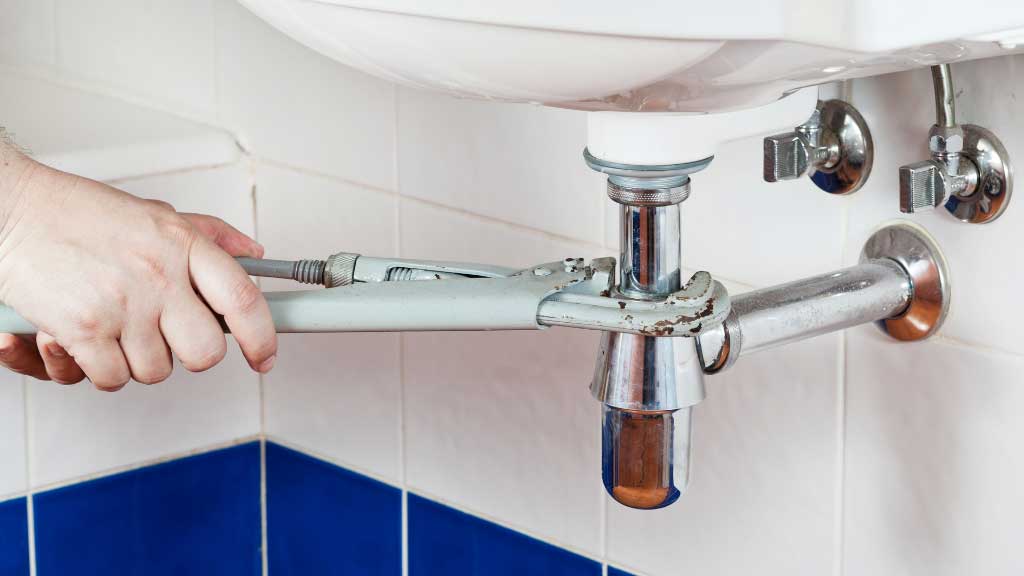
The flange is the ring that covers the drainage in your bathroom sink. It is typically composed of metal, however, it can also be constructed of plastic with a metallic finish. Water can escape through the sink at this point if this flange splits or corrodes. When completing the replacement, you have the option of replacing just the flange or the entire tile backsplash. However, you must remove the piping beneath the sink to unscrew the foundation regardless of whatever option you choose.
However, if you understand the procedures or techniques, you can replace the bathroom sink drain flange with your own. You can save on plumbing services by doing everything yourself. Rather than pondering how to do it, follow the instructions outlined below. However, before you begin, you must gather your materials. You’ll require:
- Bucket
- Wrench
- Silicon
Here are the steps you must take:
- The first step is to remove the sink stopper stuck. It is simple to remove with your hands. It’s as simple as pulling it, turning it left or right, and then scuffing it out.
- This is where you get ready to take out the sink drain. Turn on the water supply and flush everything out from beneath the sink. Put a bucket underneath the sink in case the drainage system leaks.
- Now detach the drain’s P-trap and tailpiece. Remove sink plug hole with a wrench.
- The sink drain flange must then be unscrewed. Remove the Pfister sink stopper by unscrewing it and setting it aside.
- The sink flange can now be removed. If it becomes trapped, can use pliers to free it. Don’t use too much force, though.
- Using a towel, wipe the area beneath the flange. Everything you have to do is to remove a bathroom sink stopper for cleaning.
- Replace all of the pieces, such as the tailpiece and P-strap, in their proper locations.
- To see if anything is missing, switch on the water supply.
You should be capable of completing the procedure without the assistance of a professional that now knows how to remove a bathroom sink drain flange. Essential to follow all of the instructions to the letter.
Brief Step-by-Step Guide
The key stages are the same whether you’re trying to remove the sink stopper to reach a bathroom sink drain or to have a similar style of the stopper in your kitchen.
Turn off the tap to the sink before you begin. To get through the stopper, you’ll probably have to crawl behind the sink or tub drain. Some studs can easily be pulled up and out, but you’ll need to first unscrew a holding nut from beneath the sink. Then, to gain access to the space beneath your sink, move it out of the way.
Look for the ejector pole that extends from the faucet’s back and remove the sink stopper delta faucet. A clip should be present, through which the rod will pass, holding another pole that will link directly to the drain. The vertical pivot rod is held in place by the retaining nut. Attempt to remove it by hand. If the nut is too hard, carefully twist it free with pliers or pressed down while twisting the plug away from the pivoted rod.
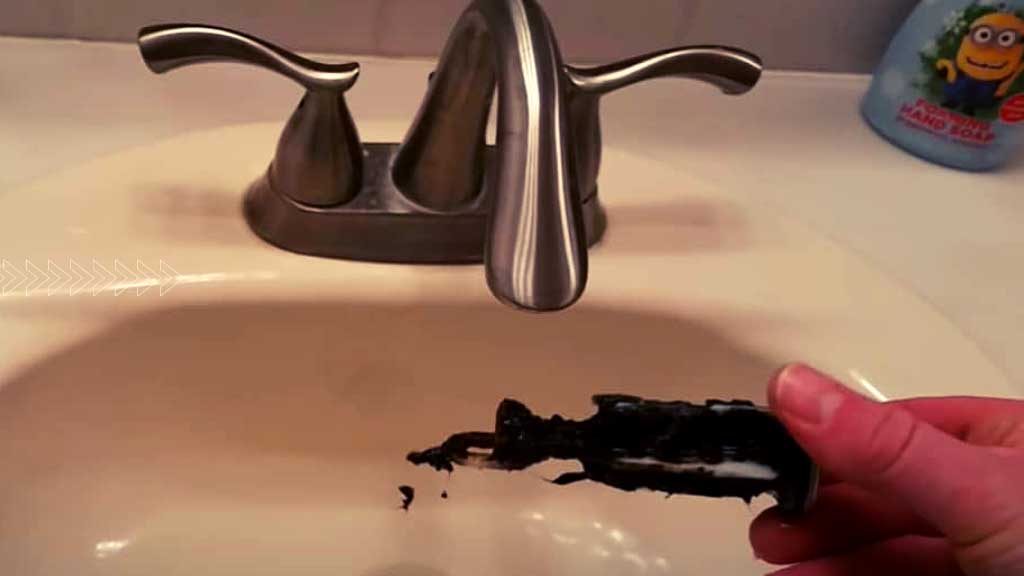
Remove the pivot pole and stopper. Examine the stopper for hair and other debris. Using a moist cloth, clean the stopper. Garbage should not be flushed down the drain. Next, examine the plug to determine if there is anything wrong with this now that could be the source of the problem.
Examine the clevis screw if the stopper is in excellent shape. If the screw is out of position, the stopper may not function properly. Replace the stopper and move the connector rod back until it connects with the bottom of the plug to check the screw position. Tighten the nut while ensuring the rod is in the proper place, then verify the motion to ensure the system raises the stopper as expected.
Check the spring clip and strap if the screw isn’t the problem. Disconnect both the buckle and the strap by loosening the spring clip. Examine the pivot rod seal after removing the gasket. If needed, clean the gasket and repair it, or install a new seal and rod.
Reassemble the parts in the same order as they were taken apart. Make any necessary nut adjustments and double-check that the spring clip is securely fastened around the strap. You can pour the tap back on after retesting the stopper. Alternatively, you can turn off the water and use the time to remove any clogs in the pipes. Pour the tap back on after you’re finished.
Also, read Best Touchless Bathroom Faucets
How to Remove Sink Stopper American Standard
Sometimes an American Standard drain stopper, just like every other stopper, might malfunction at times. This needs to be rectified right away, or else your outflow will slow down. If you’re curious about how to remove metal sink stoppers, simply follow the procedures outlined below.
- The first step is to unwind the cable attachment and separate the drainage from the cable.
- Remove the cam cap by unscrewing the screws on every side.
- To remove the sink stopper without a pivot rod, pull the cam upright and twist it slightly.
- Remove the rubber stopper from the sink from the drainpipe by lifting it out.
An American standard drain stopper can be removed in this manner.
Drain pop up Sink Stopper Is Stuck Down.
So your sink stopper won’t jump up because you pushed it down. To correct this, follow the actions outlined below.
You’ll need to take the plug out a little bit at first. Then, you may remove it with pliers by slowly rotating it. Close the move and rotate counterclockwise if it’s stuck. To use a wool wire or brush, clean it thoroughly. Mold killer or silicone spray can also be used. To loosen it up, repeat this process multiple times.
Reconstruct everything once you’ve finished. Make sure you’re not over-tightening it. So, that’s how you repair a trapped move sink stopper.
Somewhere under the sink, look for the plunger rod that links the plunger to the strap. Next, unscrew the pivoting nut after extracting the clip that connects the rod to the strap. Once you’ve done so, the plug should be able to pull out easily.
A hacksaw can be used to remove the nut. Ensure that you cut it through the security or commodity diagonally. If you’re not planning to use the drain basket again, you can see through it between the faucet and the solution provided.
Remove the flange from the sink by turning the locknut around. If it’s stuck, tap the base of the plate from under the sink with a plier. This will assist in loosening the grip on the sink drainage valve and allowing it to exit the sink.
Conclusion
If you follow the procedures correctly, you won’t require a plumber to remove a bathroom sink drain flange. You learned how to remove the bathroom sink drain flange in this article. When you try to accomplish things on your own, this should come in handy. In addition, you can current contracts to prevent leaks by replacing a drain flange.
Hi, I’m Jana, author and interior design enthusiast. I understand that turning a house into a space that reflects you is no small feat. However, if you have the right information to start with, you can make the process much easier and simpler. That’s why I like putting together handy guides and articles on home design and decor subjects, that you might not have known you needed to learn about until you have to choose them for your home. If you want to learn about products on the living space design market in order to choose what befits your home, this is the right place for you.